

!!!!! Rules/guidelines!!!
When shooting your photographs for each assignment you need to make sure you follow ALL the rules.
-
You must have a pass (each person)
-
You must stay on task
-
You cannot go into a classroom with students present
-
You cannot be loud and interrupt classes (avoid going by the classrooms period)
-
You can go outside but must stay on campus
-
You must be respectful
-
You must make sure all photos are school appropriate in content
Before Leaving Class - IPHONE USERS ONLY
Check Camera Formats

Mrs. St.Clair
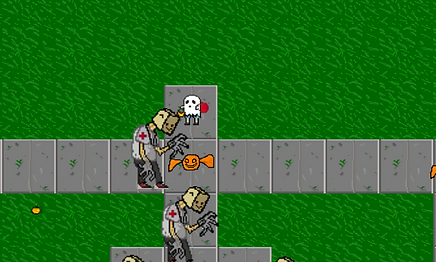
Tile Map Game
Learning Target: I can create a maze game. I can code for a count down timer. I can add obstacles. I can add music. I can create a score. I can create a pickup. I can create a game to be played by others.

Maze games have been around for awhile. One of the most popular maze games was PacMan. The player had to guide PacMan around a board, avoiding the ghosts and collecting the power ups. This game was not only one of the most successful arcade games, but a popular game to play on a console at home. PacMan soon had a spin off -Ms PacMan, as it grew in popularity. Over time, PacMan has become a cultural icon and can be found on lunch boxes, in movies, and even a stuffed toy.
You will need a minimum of 2 tiles for the ground, a character, and a pick up. In this lesson you will code to move the objects, score and end the game. You will also create an obstacle for your player to avoid. Click the link above to learn how to create your sprite sheet for this project.


LT: I can create a new project and import my sprite sheet.
Create your new project and save to flash drive or on somewhere on the computer (preferably the desktop or documents).Click on the button to download 2 different tiles for your background. One tile will be your path. The other tile will be the border of the game.
LT: I can create a TileMap. I can use the Tile Palette.
In the video below, students will learn how to create a TileMap and How to use the Tile Palette in Unity.
LT: I can create a player for my game.
Watch the video to see how to set up your player for the game.
LT: I can create a pick up to collect.
For this game, the player will increase the score every time it collides with a specific object you created.
LT: I can create an obstacle
Create an object to be an obstacle and then add into the game.
LT: I can add in text for a score
Create the text for scoring and winning the game.
Coding
LT: I can type code to make my player move. I can script to make an object rotate. I can script to keep score. I can script text.
This step of the project is what makes the game work. There are many coding languages out there, C++, Java, Python, etc. We will be using C# in either MonoVisuals or Visual Studios depending on the computer. These programs both work the same.
As you start this next step, please note -
YOU HAVE TO TYPE IT EXACTLY!
If there are any mistakes the game will not work at all, or will not work correctly. Once again, it must BE EXACT!
Now, with all of that being said, if your game doesn't work as it should, go back and rewatch the video until you get it right. Stop and go back to check your script until it does work. This is a key part of making games, persistence. Stay with it until it works. And if that doesn't work, after you have tried all these steps, then ask for help.
9. Code the Player to Move.
LT: I can code movement
Students will type the code using what they learned from the previous project and add to it. This will allow the player to move in all directions.
Camera Follow
Turn in screen recording to Google Classroom.
Coding
LT: I can type code to make my player move. I can script to make an object rotate. I can script to keep score. I can script text.
This step of the project is what makes the game work. There are many coding languages out there, C++, Java, Python, etc. We will be using C# in either MonoVisuals or Visual Studios depending on the computer. These programs both work the same.
As you start this next step, please note -
YOU HAVE TO TYPE IT EXACTLY!
If there are any mistakes the game will not work at all, or will not work correctly. Once again, it must BE EXACT!
Now, with all of that being said, if your game doesn't work as it should, go back and rewatch the video until you get it right. Stop and go back to check your script until it does work. This is a key part of making games, persistence. Stay with it until it works. And if that doesn't work, after you have tried all these steps, then ask for help.